Madrileños must like crisps. If you take a walk in pretty much any of Madrid's neighborhoods, you will soon come across one of those frutos secos shops, with a giant wall of crisps showing off from the shop's window:
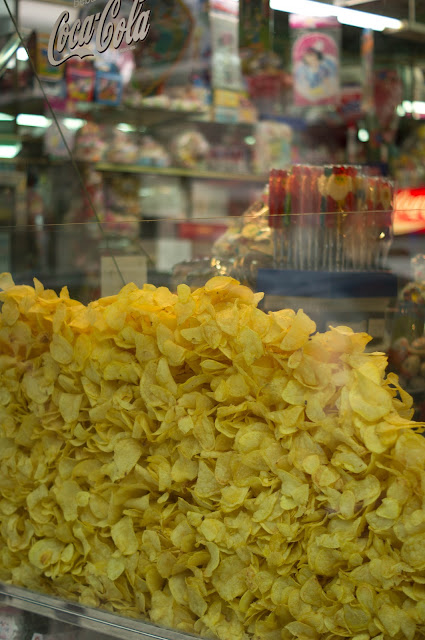 It's usually good stuff, try them if you have the chance.
Things get more difficult if you are looking for a good portion of French fries, though. Proper fries for me (for everybody, I guess) should be soft on the inside and crispy-crunchy on the outside; also, the REAL GOOD fries, the ones that you can find for example in Belgium, sold by incospicuous street stalls, tend to be rather big: not the frozen thin parallelepipeds from supermarkets, nor the meh little thingies of Burger King/Mac, but big, luxurious potato wedges.
Unfortunately the fries you can find in Madrid's bars tend to be limp.
Limp fries=nono. I looked for venues where to get good ones, and I found out there is a pretty little Belgian place right next to Plaza Mayor, it's called Cafeeke (which means "little café" in Flemish, I am told). It's pretty good, with nice atmosphere, old dark wood furniture, many great beers and street food that Dutchmen and Belgians love, like frikandel... Some other time I'll talk about it in detail, here I just wanted to note that even the fries sold there are not REAL GOOD fries. They are certainly very good, better than Madrid average; but they don't reach The Belgian Excellence in my opinion, at least because of the size. Besides they are expensive, 4.50 for fries is not fair price.*
So in the end I decided to try making them at home. After some research and a good amount of experiments, here is where I stand.
Basic principles of Belgian fries
Learning to fry
The general consensus is: if you want them crispy, you need to fry the potatoes twice; first at low temperature and for a fairly long time, then at high temperature for a short time. In between the two fryings you have to let the potatoes rest - or sweat, like someone says - for a while.
(obviously I am assuming you are starting from fresh, uncooked potatoes. The frozen packets you buy at the supermarket already went through the first phase, which is why you can fry them for a few minutes and they are ready; by the way, even using those the final result is crunchier than the average stuff you find in Madrid's bars :))
Now, you might be asking: ok, at what temperature exactly should I fry the potatoes then? and for how long?
It depends. If you google it, you'll see that different sources give different numbers: could be
130º for 5 mins/15 mins rest/160º for 2 and a half mins
or
160º for 6 mins/30 mins rest/180º for 2 mins
or many other combinations; the time of the first frying can go up to 10 mins or more. Some even say you should fry the potatoes 3 times for best results. Heston Blumenthal as usual describes a hardcore procedure: 10 mins boiling followed by some resting time in the fridge, then first frying, then more resting time, then second frying (kind of long, but your fries are supposed to be perfect at the end of all this).
My impression is that temperature and especially cooking time can vary depending on the size of the potato pieces you have cut. Bigger fries need more time. Below I will give you the numbers I usually apply, but I guess some trial and error on your side might be unavoidable.
Agua
Another variable that can affect crispyness is the amount of water present in the potato: more water means more chances to have soggy fries. This has a few consequences:
*The variety of the potatoes you are using can be important. Buy "patatas para freír" at the supermarket, supposedly they contain less water.
*If you wash the potatoes after peeling them, remember to pat them dry. This will also prevent the oil from doing funny stuff when you throw the potatoes in.
*There is a size limit: if the fries are too big, they'll retain too much water and always end up limp. I would not go past 1 cm thickness when cutting the potatoes.
Oil
I use olive oil (aceite de oliva sabor suave). I don't think it's worth using extravirgen, as it doesn't give better results besides being more expensive - and less heat-resistant, according to some people. By the way, I plan to write a post soon about the types of oil commonly used in frying.
Deep fryer or pan?
Well, a deep fryer (freidora) allows you to set the temperature of the oil, so obviously it makes things much easier. You can also use a thermometer like this, that's even more precise. If you only use a pan, again you might have to go through some trial and error before getting things right, but you will have wonderful results just the same.
What is starch again?
I read somewhere that it's a good idea to soak potatoes in cold water for half an hour or so before frying them (or alternatively keep them under running water for a while). By doing that, I believe you are doing some stuff to the starch inside the potato (I have no idea of what, exactly) and the final result is supposed to be more crunchy. If you want to give it a try, go for it, just remember to pat them dry once you are done.
My way
Here is how I do it. I peel a lot of those patatas para freír (because you can never have enough fries), trying to pick the ones that have roughly the same size. I wash them quickly in cold water, then carefully pat them dry. I cut them in pieces more or less of the same size: my standard fry is about 7 or 8 mm thick (precision is everything :)), or in any case thicker than 5 mm and less thick than 1 cm.

I put oil in the freidora. I put the soon-to-be fries in the bucket of the freidora, without overloading it (I cook them in batches if I have a lot - I usually do). I set the temperature at 150º, then fry the potatoes for 8 minutes. They should not yet gain a golden color at this stage, or maybe just a little bit; if they do get a lot of color, the oil temperature is too high.
[Alternatively, when I don't have a freidora, I put a lot of oil in a deep pan, and I heat it. From the start I throw in a piece of old bread: according to my mother, this prevents the oil from burning:), and also it tells you when the oil is ready, as you will see the usual little bubbles that the frying oil creates around the bread. Throw in the potatoes when the oil is still not very hot, i.e. when there are few bubbles around the bread. Keep the heat on low or medium low for the whole 8 minutes, and remember the fries should just start to get a little bit of color at this stage, but no more than that.]
In the meantime, I put some oven paper on a flat, heat resistent surface that I don't mind staining with oil - could be the oven tray, for example. After 8 minutes, I remove the fries from the oil and distribute them on the oven paper. They should not touch each other, and they should rest for approximately half an hour. I generally use this time to fry a second batch (also this second batch will need to rest somewhere for half an hour, of course).
I prepare some kitchen paper in a deep plate, for when the fries will be ready. After half an hour, I heat up the oil again, this time to 190º.
[When I don't have a freidora, I just heat up the oil until there are a lot of bubbles around the piece of bread, and during the frying itself I keep the heat on high.]
I throw the potatoes in, and I fry them until they have a color I like; it usually takes no more than a couple of minutes, so better keep an eye on them to avoid burning. I take them out, I drop them in the plate with the kitchen paper, and voilà! Proper fries.
*I like alliterations :)

 What about a good dose of gingerbread cookies to celebrate Christmas??
This year, I chose Rose Bakery's version (from her lovely cookbook)...
For 20-25 cookies (depending on the size of your cookie-cutter :P):
125g unsalted butter room temperature
90g cassonade (beet brown sugar very common in France. You can use brown sugar, if you can't find it)
3 tablespoons honey (I used Orange blossom honey, I find it perfect with spices..)
1 beaten egg
370g sift white flour
1 tablespoon baking soda
1/2 teaspoon salt
1 tablespoon ground 4 spices
1 teaspoon ground cinnamon
1 teaspoon ground ginger
In a large bowl whisk together the butter, cassonade and honey until light and fluffy. Add the egg and then all the dry ingredients: flour, spices, baking soda and salt. Beat until all the ingredients are well incorporated.
If the dough is too dry, add an extra egg; if it's too wet just add some more flour.
Wrap the dough and refrigerate it for at least 2 hours or overnight.
Preheat the oven to 180º and line 2 baking trays with parchment paper; roll the dough to a thickness of 5-6 mm and cut the cookies with your favourite cookie cutter(s). Use a spatula to lift the cookies onto the baking sheet. Bake for 10-15 minutes or until they just start to brown.
Remove the cookies from the oven and let them cool before eating, or serving :).
PS: If you happen to be around Lavapies these days, you should definitely visit Lavapiés Xmas crib (better known as El Belén de Lavapiés @ CSA Tabacalera)

It is fairly well known that Italians love to talk about food (just look at Chiara and me, we have a food blog!). But to tell you the truth, Italians talking about food often turn out to be a conservative, stubborn bunch, "campanilisti" to the bitter end. Campanile means steeple; every little town in Italy has a church with a steeple, so campanilista is someone with limited views and ideas, that mindlessly supports the traditions and the views of the environment he comes from, no matter how small/suffocating. The way we cook [insert name of dish here] in [insert name of town here] is the best; it doesn't matter if somewhere else the same dish is prepared differently, what do they know in [insert name of rival neighbor town here]?
Maybe the fact that culinary traditions in Italy are very diverse is sort of a positive side effect of this widespread mentality. In any case, I just wanted to warn you about this campanilismo thing first, as a kind of disclaimer. This is my recipe for ragù, it is a fairly traditional one and I believe it gives splendid results; but there are a million other recipes out there, so don't think of it as the Secret Official Traditional Ragù Bolognese. It is entirely possible that other Italians will tell you their version is better - maybe it's true, ask them to prove it. Me, I am not even from Bologna. Also I put milk, and I am pretty sure many people don't do that ("Milk??" they would probably think if they'd read this, "Crazy!!").
(actually, there was this episode of a TV show called In Search of Perfection where this famous chef is sort of searching for the perfect ragù, and it's funny how the cook from Bologna replies to his question about the use of milk in the sauce: "Definitely not in this city!")
So, without further ado, my recipe.
Timing:
-a couple of hours (unless you use a pressure cooker, that's half the time)
Some useful tools:
-a deep antistick pan with a lid (or a pressure cooker if you feel fancy, or a Thermomix if you feel super-fancy)
-a blender (optional, if you feel lazy)
Ingredients:
-80g butter
-800g beef minced meat
-200g bacon or sausage; basically any pork meat with a good amount of fat works, I think. I usually go to the market and ask for panceta, not smoked (ahumada) nor salted (salada), just plain panceta
-1 onion
-1 carrot
-1 celery
-1 glass of red wine
-1 regular can of tomato sauce, or 1 regular can of whole tomatoes; in this case just break them into pieces before throwing them in. Careful not to buy tomate frito by mistake
-1 teaspoon of concentrated tomato
-1 meat stock-cube
-around 1/4 of a liter of milk (or maybe some more)
-nutmeg
-pepper
-salt
Note that with these amounts you will get a lot of ragù, enough to feed some ten people with spaghetti. Remember it lasts a few days in the fridge - I find that it actually tastes better one or two days after you have made it. You can also freeze it, of course.
How to:
Chop onion, celery, carrot and fattie pork meat into little pieces (if you are using panceta, remember to remove the hard skin/parts from it). You can also throw everything in a blender if you have one, it's actually faster (I kind of wonder if some defender of the tradition would disagree on this. Maybe they'd claim the heat generated by the the blender would alter the taste of the ingredients, like in the case of pesto alla genovese?).
Throw the chopped stuff plus the butter in the deep antistick pan, and turn on the heat to medium. Stir every now and then. After 5 mins, add the beef and keep stirring. When the beef is browned, throw in the glass of wine, keep stirring for a few more minutes. When the wine is absorbed/evaporated, throw in the tomato sauce and the spoonful of concentrated tomato; stir again, then throw in enough milk to completely cover the mass of meat and veggies.
At this point I generally add one stock-cube, a teaspoon of salt, some pepper, and half a nutmeg (grated, of course. By the way, it's a good idea to buy whole nutmegs and grate them when needed rather than using pre-ground ones, the difference in taste and fragrance is substantial - you probably know already, but just in case).
Lower the heat, cover with a lid but without closing the pan completely - leave the lid a bit askew. The sauce should simmer for at least one and a half hours, and become a thick creamy thing. Every now and then stir, check that it's not getting too dry (you can add milk again, or just water), and taste, of course, in case you have to add seasonings.
Variants:
I recommend you try some ragù experiments of your own, this is a very flexible preparation: if you take a look at Heston Blumenthal, the British chef I linked above, you'll see he does some really crazy stuff.
I once replaced the regular red wine with Pedro Ximenez dessert wine; that made the sauce much sweeter, I used it for lasagne and they were very well received. Other times I tried to put smoked salt in the sauce, and I liked the result a lot (but might be because I love pretty much all smoked food). I also tried to use whisky, cognac, rosemary, etc, it's all stuff that gives some interesting twist.
Beef: which cut?
There are discrepancies here, as some sources claim lean cuts are better, while others prefer parts that include fat. I favor fat cuts, first of all because they are cheaper, and personally I think of ragù as proletarian food, a bit like chili con carne. Lean cuts just don't belong here :). Besides, fat cuts cooked slowly in liquid are supertasty. So my choice would always be the regular minced meat that you can find at the market (and that usually has quite some fat), supported by good old panceta.

First of all WELCOME to our blog :).
I didn’t really know what recipe start with, but I got pomegranate in my bio-box this week and I thought about using them for a very simple risotto with parmesan and aged ricotta, a cheese that I love.
I must admit pomegranate is perfect for exercises in style, not only for his color that varies from grain to grain, for his brightness and his shape, but also for his fresh and crunchy taste.
So I thought I couldn’t go wrong mixing it with simple and “warm” ingredients such as parmesan and aged ricotta :).
Well.. the result is really interesting, a seasonal must - if you like pomegranate and think it’s worth spending some time shelling all its grains ;).
 Ingredients for 2:
200g rice, of Arborio or Carnaroli variety. Can be found at El Corte Inglés or at Carrefour
Vegetable stock
1 small onion
30g butter
100g Parmesan
50g aged ricotta - ricotta stagionata in Italian, a seasoned cheese with a rather strong taste. Poncelet sells it, but if needed you can replace it with some strong sheep milk cheese (queso de oveja curado). Note that it's very different from plain ricotta, which is a fairly common Italian young cheese, similar to the Spanish requesón
1/2 pomegranate
1 small glass of white wine
Heat the butter in a large non-stick pan, add the chopped onion and brown it over medium heat. Add the rice and stir it well with onions and butter until it looks slightly translucent; add the white wine and keep on stirring. The wine will evaporate and leave a very tasty essence to the risotto. Once the wine is completely absorbed, add the first ladle of stock and a good teaspoon of salt. Stir until the rice simmers, then turn the heating down. Next steps are all about adding stock and stirring while the rice absorbs the liquid. This won’t last forever, obviously :). Risotto normally takes around 20min to be ready, but after the first 15 mins always taste some grains before adding more stock. This will save you from a risotto that's too soft and will make you able to embrace the famous “al dente” philosophy ;).
Once the risotto is ready, remove it from the heat; add parmesan, ricotta and the remaining butter and stir quickly. Then let it rest for a few minutes; this is crucial, if you like creamy risotto!
Serve adding grains of pomegranate.


